Wednesday, 31 October 2012

Spooky Halloween Cupcakes

So today my mum asked me if I would mind making some cupcakes for her to take into work tomorrow, and of course I happily agreed. Now most Halloween cupcakes I see are gorgeous to look at but I personally wouldn't want to eat, due to the vast quantity of fondant icing used. So I decided to go for a simple yet chic take on the Halloween cupcake. 

Ingredients:

4oz/125g butter
4oz/125g caster sugar
3oz/100g self raising flour
1oz/25g cocoa
2 medium eggs 
1tsp vanilla extract

Buttercream:

5oz/125g unsalted butter
10oz/250g icing sugar
1tsp vanilla extract
Orange gel food colouring
Piping Nozzle
Piping Bag

Optional:

Popping Candy
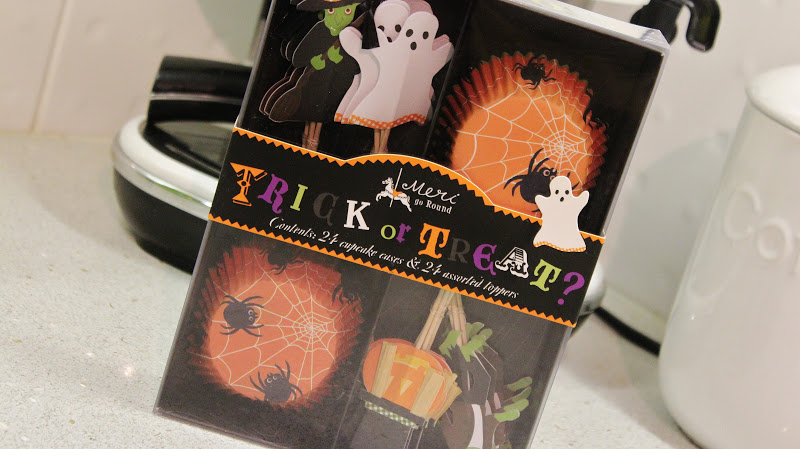
Halloween Cupcake Decoration Kit


Method:

Pre-heat the oven to 160° C fan , 180°C , 350°F/ gas mark 4.

Put 12 muffin cases into a muffin tray.

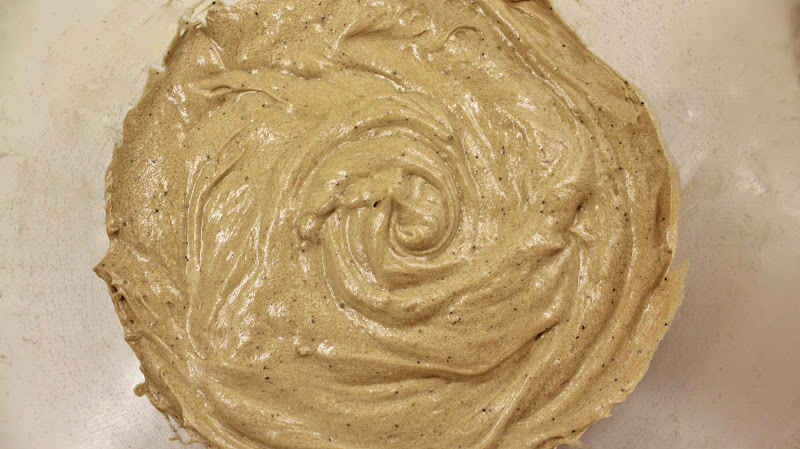
Cream together the butter and sugar, then gradually add the eggs, about a tablespoon at a time and beat after each addition.

Mix in the vanilla extract. 

Using a large metal sieve sift the flour and cocoa into the bowl then gently fold the flour and cocoa into the mixture until thoroughly mixed.

Carefully spoon the mixture into the cupcake cases, filling them to about two thirds full.

Bake in the oven for 15-20 minutes, until the cupcakes are golden and slightly raised.

To check they are cooked insert a skewer into the centre of one of the cakes – it should come out clean. If the mixture is stuck to the skewer return the cakes to the oven and cook for a further 5 minutes or until the skewer comes out clean.

Remove from the oven and leave in the tins to cool for approx 10 minutes then transfer to a wire rack to cool.

Whilst the cakes are cooling make the buttercream, place butter in a large mixing bowl, and beat until soft. Gradually sift in the icing sugar mixing well after each addition.

Then add the food colouring a little at a time to the buttercream until you get the colour you desire.

Then place the buttercream into a piping bag and pipe your preferred design onto your cupcakes.

For the final touches add some popping candy to leave a little surprise for the cupcake eater, and use halloween decorations if you wish.


And there you have some spooky halloween cupcakes! 
I am tempted to make some different ones with fondant icing just to practice the technique of using that particular icing. Have you made any baked goodies for Halloween this year? If so I'd love to hear what you've made in the comments below.


Hope you have a ghoul filled Halloween!

Chloe xo

Sunday, 28 October 2012

Birthday Brownie Cupcakes

So today it is my cousin's 21st birthday party, it only seems like yesterday when we were running around playing hide and seek in our grandparents garden. How time flies! Anyway I decided to make him some brownie cupcakes to celebrate the occasion.

Ingredients

225 g/8 oz of plain chocolate broken into pieces
85g/3oz of butter
2 large eggs
200g/oz of soft dark brown sugar
1tsp of vanilla extract
140g/5 oz of plain flower

Method:
Preheat the oven to 180c/350f/gas mark 4.

Line a 12-hole muffin tin with 12 paper cases .

Place the chocolate and butter in a saucepan and heat gently, stirring constantly until melted.

Remove from the heat and stir until smooth and leave to cool slightly.

Place the eggs and sugar in a large bowl and whisk together then add the vanilla extract .

Stir in the flour until mixed together,then stir melted chocolate into the mixture until combined.

Spoon the mixture into the paper cases, and then bake in the preheated for 30 minutes, or until firm to the touch but still slightly moist in the centre.

Leave the cupcakes to cool for then minutes then transfer to the wire rack to cool completely, when cooled and a dusting of icing sugar.


And there you have it, I had a lovely time and it was great to catch up with the family. Are you tempted to make these, if so let me know what you think.

Chloe xo

Saturday, 27 October 2012

Paul Hollywood's Chelsea Buns

I wanted to do some baking today so I decided to take inspiration from the last GBBO masterclass, I literally cannot wait for the Christmas special! I chose to make Paul Hollywood's Chelsea Buns, now I have to admit that I have a bit of a love/hate relationship with Paul on the one hand he can irritate me but on the other hand I can't help but admire his talent ....... and eyes. 

Ingredients:

500g/1lb 2oz strong white flour, plus extra for dusting.
1 tsp salt.
1 x 7g sachet fast-acting yeast.
300ml/10fl oz milk.
40g/1½oz unsalted butter, plus extra for greasing the tin.
1 free-range egg.
Vegetable oil, for greasing.

Filling:

25g/1oz unsalted butter, melted
1 orange, zest only, grated
75g/2½oz soft brown sugar
2 tsp ground cinnamon
100g/3½oz dried cranberries
100g/3½oz sultanas
100g/3½oz dried apricots

To Finish:

1 heaped tbsp apricot jam
200g/7oz icing sugar, sifted
1 orange, zest only, grated

Method:
1. Place the flour and salt into a large mixing bowl and stir until thoroughly combined. Make a well in the centre of the flour and pour in the yeast.

2. Warm the milk and butter in a small saucepan until the butter is melted and the mixture is lukewarm. Pour into the flour mixture, add the egg and stir thoroughly until the contents of the bowl come together as a soft dough.

3. Tip the dough onto a lightly floured work surface and knead well for five minutes, until the dough is smooth and elastic.

4. Place the dough into an oiled bowl and leave to rise, covered with a damp tea towel, for one hour or until doubled in size.

5. Tip the dough out onto a lightly floured work surface. Roll out dough into a rectangle about 30x20cm/12x8in.

6. Brush all over with the melted butter. Evenly sprinkle the orange zest over the buttered surface, followed by the sugar, cinnamon and dried fruit.

7. Tack down the long side of the dough rectangle nearest to you by pressing it down onto the work surface with your thumb. Roll the opposite long side of the dough towards you quite tightly, until the roll is complete and tight. With a sharp knife cut into 10 4cm/1¾in thick rounds.

8. Grease a deep roasting tin or baking tray thoroughly with butter.

9. Place the buns, cut side up, into the greased baking tray leaving about 1cm/½in of space between each one. You want them to be close enough so that when they rise further and then bake, they will bake with their sides touching. They can then be pulled apart and you get a lovely soft edge.
10. Leave to rise for about 30 minutes in a warm place.

11. Preheat oven to 190C/375F/Gas 5.

12. When the buns are ready, put them in the oven and bake for 20-25 minutes until golden-brown. Check after 15 minutes or so and cover the buns with foil if they are getting too brown.
13. Remove the buns from the oven and let them cool slightly before transferring them from the tin to a cooling rack.

14. Melt the jam in a small saucepan with a splash of water until smooth. Brush the jam over the buns to glaze and allow to cool.

15. Mix together the icing sugar, orange zest and two tablespoons water. Drizzle the icing over the cooled buns and allow to set before serving.

And there you have it, I'm quite pleased with these for a first attempt I think next time I'll bake them individually and see if it makes any difference, you never know until you try! I really recommend making these they taste like Christmas it's amazing!

 Chloe xo

Wednesday, 24 October 2012

The Easiest Flapjacks Ever!

Before the GBBO masterclass started today I decided to make some flapjacks, and the recipe happens to come from none other than the queen of home baking herself the one and only Mary Berry. These flapjacks are so easy to make, I thought it was going to be rather more complex! So if you're looking for an easy recipe to try than look no further this. 

Ingredients

250g rolled oats
125g of butter
90g golden syrup
90g Muscovado sugar
 A few squares of dark chocolate

Method:

1. Lightly butter the roasting tin or cake tin.

2. Combine the butter, syrup, and sugar in a saucepan and heat gently until the ingredients have melted and dissolved. Stir in the oats and mix well.

3. Spoon into the prepared tin and smooth the surface with a palette knife. Bake in a preheated oven at 180C (160C fan, Gas 4) for about 30 minutes.

4. Leave to cool in the tin for about 5 minutes, then drizzle the dark chocolate on top of the flapjack. Leave to cool completely, then cut and remove from tin.


And there you have it, I told you it was easy! Have you tried this recipe before if so what did you make of it? Next time I think I'll experiment with the flavour, I might add something like raisins or cinnamon.

Chloe xo

Saturday, 20 October 2012

White Chocolate and Raspberry Loaf

As I said in my previous post I am a huge GBBO fan, and two of my favourite contestants this series were Cathryn and Sarah-Jane, and I was delighted to find out they have a blog which you can find here. They are also setting up a stall near to where I live so hopefully I can pop along and say hello.
Cathryn and Sarah-Jane have already posted some really scrummy looking recipes on their blog so I thought I'd give one a go, I decided to make the white chocolate & raspberry loaf. This recipe comes direct from the blog so all credit goes to Cathryn and Sarah-Jane. 

Ingredients

For the Cake:
8oz self raising flour
 8oz soft unsalted butter
8oz caster sugar
4 Eggs
1/2 teaspoon vanilla extract
pinch of baking powder
100g white chocolate (cut into chunks)
75g fresh raspberries
squeeze of  lemon juice
1/2 tablespoon icing sugar

For the Glaze/icing:
100g full fat cream cheese
1 tablespoon strained raspberry jam
100g icing sugar

To decorate (optional)
75g white chocolate chips
sprinkle of freeze dried raspberry powder

Method: 
Preheat the oven to 170.

Firstly in a small bowl mash the raspberries with the icing sugar an dash of lemon juice, set aside.

Cream together the sugar, butter and vanilla until very pale, light and fluffy.

Beat the eggs in a small bowl and add slowly into the butter/sugar mix (alternate with a spoonful of flour if it looks like it may curdle.)

Sift in the flour and baking powder and mix to combine.

Then fold through the raspberry pulp and chopped white chocolate to create a ripple effect.

I popped this into a large disposable piping bag and cut a large hole in the end and piped it into the cases (which were already on a baking tray) for ease, but you could simply spoon it in if you like.

Bake for around 35 mins until golden brown and springy to the touch.

The mixture has a lot of liquid in it due to the raspberries which makes the finished cakes lovely and moist, but it does mean they sink a wee bit in the middle as they cool so don't worry about this if it happens (it did to me anyway.)

Whilst they cool, make the icing/glaze by putting the seedless/strained jam in a bowl and mixing until looser and smooth, then add the cream cheese and icing sugar and stir to combine.

Pour this onto the cooled loaves and decorate.


I had some mixture left over so decided to make a few cupcakes, as I didn't want to waste any of the mix, hope you enjoyed this recipe and once again thank you to Cathryn and Sarah Jane :)

Chloe xo